Easy guide for MUI autocomplete search with link option in Next.js

Material UI (MUI) autocomplete
MUI autocomplete is a “text input enhanced by a panel of suggested options” as cited by MUI.
You can choose between combo box which stands for a predefined list that you must choose from, or
You can use freeSolo which let you type in text and give you suggestions.
In this tutorial we are going to see how to setup MUI autocomplete and use the suggested searches as links that we can click on.
Setup MUI autocomplete
-
Navigate to your Next.js project
-
Install mui, @emotion/react, @emotion/styled and @mui/material using:
npm i mui @emotion/react @emotion/styled @mui/material
Once the installation has finished, you will be able to see that the packages has been added to package.json
Use Autocomplete with its props
Like any React component, the autocomplete use props to customize its appearance and features, it has a rich API that you can check in this link, in the meanwhile let’s build our autocomplete with a list of links on it.
Navigate to your project and create components/search.js
import TextField from '@mui/material/TextField';
import Stack from '@mui/material/Stack';
import Autocomplete from '@mui/material/Autocomplete';
import Link from 'next/link';
import Router from 'next/router';
import {useEffect, useState} from 'react';

export default function SearchBar({posts}) {
	const [show, setShow] = useState(true);
	useEffect(() => {
		Router.onRouteChangeStart = () => {
			setShow(false);
		};

		Router.onRouteChangeComplete = () => {
			setShow(true);
		};
	}, []);

	return (
		<Stack spacing={2} sx={{width: 300}}>
			{show ? (
				<Autocomplete
					id="free-solo-2-demo"
					options={posts.map((option) => option.title)}
					renderOption={(option) => {
						const post = posts.filter(
							(element) => element.title === option.key
						)[0];

						return (
							<li key={option.key}>
								<Link
									href={`/category/${post.category}/posts/${post.slug}`}
									passHref
								>
									<a className="hover:underline hover:text-blue-500">
										- {option.key}{' '}
									</a>
								</Link>
							</li>
						);
					}}
					renderInput={(params) => (
						<TextField
							{...params}
							label="Search articles"
							InputProps={{
								...params.InputProps,
								type: 'search'
							}}
						/>
					)}
				/>
			) : (
				<></>
			)}
		</Stack>
	);
}
The autocomplete parameters that we have used here are:
- stack: an MUI component that manages layout of children, we give it a width of 300 pixels
- options: takes in an array, in our case this is an array of articles titles, you can provide also a static array if you wish.
- renderOptions: takes in a function to render the option, in our case we are rendering each option as a link
- renderInput: takes in a function, and return MUI TextField to create the space where the user can type.
We add in also a couple of tweaks, and we are using React useState, useEffect, next link and next Router component.
Whenever a route is changing, which we can predict by using the Next.js routing event onRouteChangeStart, we hide for a while the search bar, and we are rendering it again when the route change is completed via onRouteChangeComplete.
The useEffect is used since navigation and rendering is done on client side.
Reuse the autocomplete component
Now, we are able to reuse our component, we can call it in any page of ours using
pages/index.js
import SearchBar from '../components/search';
export default function Home() {
	const posts = [
		{title: 'article1'},
		{title: 'article2'},
		{title: 'article3'}
	];

	return (
		<div className="flex md:flex-row flex-col md:justify-end items-center justify-center md:mx-3 my-2">
			<div className="mx-2 text-red-500 font-medium">New</div>
			<SearchBar posts={posts} />
		</div>
	);
}
We create a sample posts array to use, and we are using tailwindcss for our CSS, you can check [this link][3] to see how to use it with Next.js
You can see the autocomplete in the screen
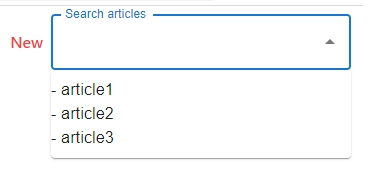
The same mechanism is also used in this website on the home page.
click [here][4] and try it yourself.
Type Next.js in the search bar for example and click on one of the links and you will see how fast it is.
Conclusion
We have seen how to use material UI autocomplete free solo and render the options as links that you can click on using Next.js project.
